
Common Questions
Getting Started
First, click on the picture that matches your CloakBox firmware below.
To determine which version you have, log in to your CloakBox to view the main page. Select the picture below that best matches the main page on your CloakBox. If you do not know how to log in to your CloakBox.
CloakBox with AsusRT Merlin firmware:
If you log in, and you see the wizard hat then it is an AsusWRT Merlin powered CloakBox. For further instructions, click the image below:

CloakBox with AsusWRT firmware:
If you log in, and it says "Asus" then it is an AsusWRT powered CloakBox. For further instructions, click the image below:

CloakBox with Tomato firmware:
If you log in, it says "Tomato" or has the WiTopia logo, then you have a Tomato powered CloakBox. For further instructions, click the image below

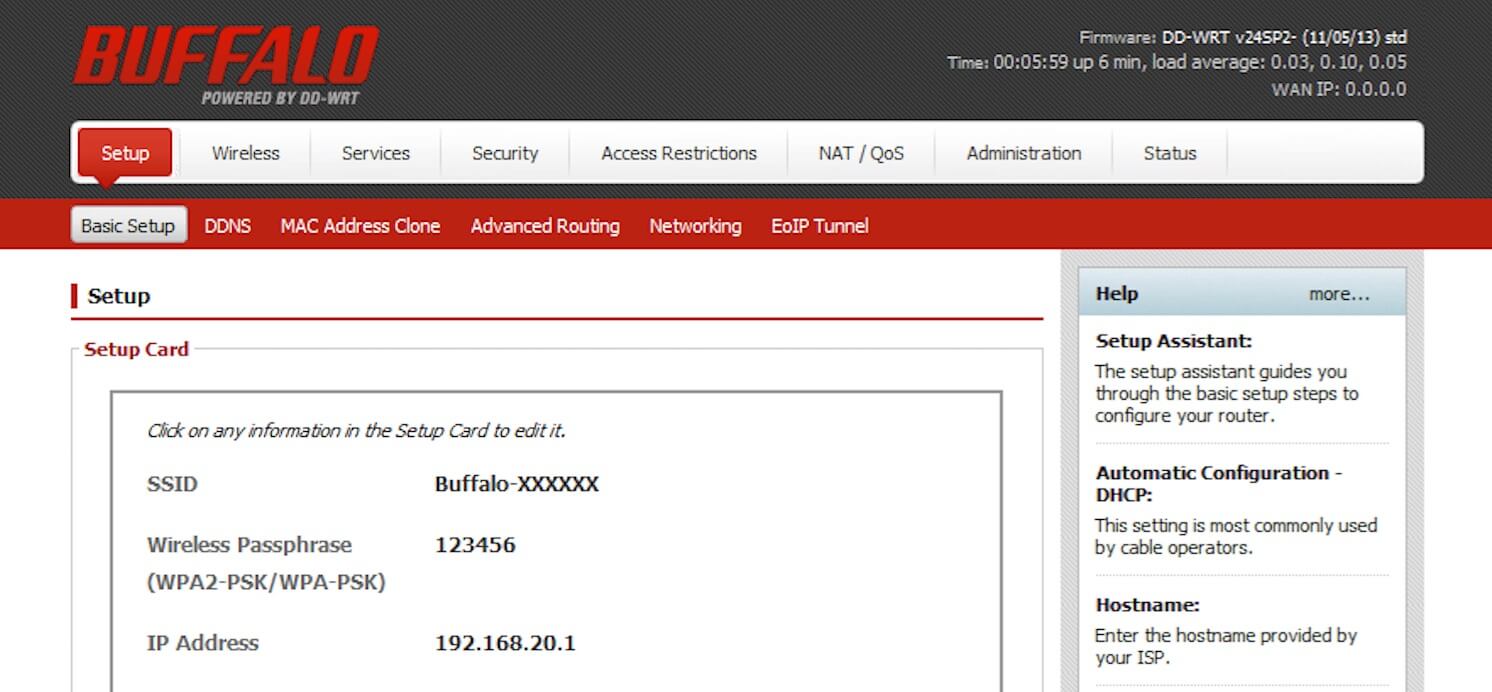
CloakBox with DD-WRT firmware:
If you log in, and it says "DD-WRT" or "Buffalo" then you have a DD-WRT powered CloakBox. For further instructions, click the image below:
How to login to your CloakBox
- First, make sure this computer is connected to your CloakBox via WiFi (wireless) or Ethernet (cable).
- To log in to your CloakBox please click here: 192.168.20.1 If the link does not work, please copy the link or just type it directly into the address bar in your browser.
- You will be prompted for a username and password enter the details provided with your CloakBox. Default settings are as follows:
- Username = admin (must be all lowercase)
- Password = your customer number - see below for further details
The password was included in the box with your the router. Please check under the lid - or - in the welcome letter that came with it.
You can also view your customer number by logging in to your portal account, CLICK HERE TO LOG IN
Your customer number will be in the top right corner, below your name.
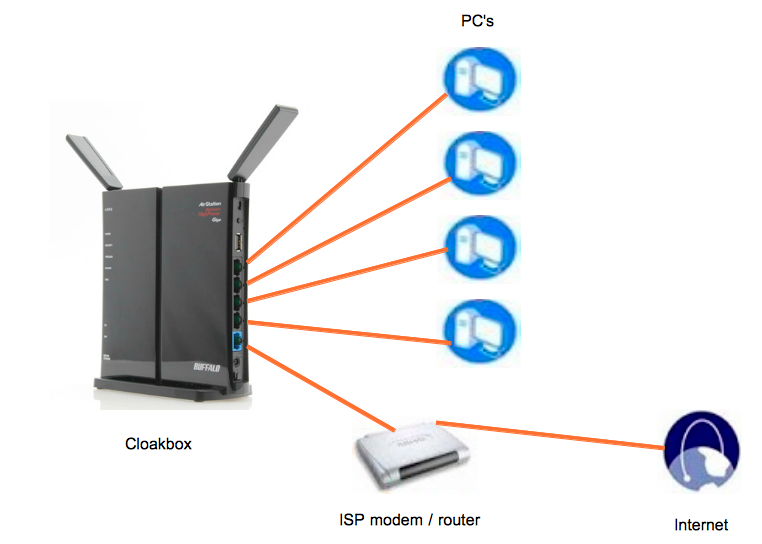
How to connect my CloakBox to the internet
The following diagram shows the suggested setup of the CloakBox unit.
If you are still having issues with the CloakBox connecting, please try the following:
- Verify your Internet connection is working without the Cloakbox present.
- Connect an Ethernet cable between your existing ISP provided cable or DSL modem and the blue port marked "Internet" on the back of the CloakBox.
- Connect a computer or laptop with an Ethernet cable to one of the Cloakbox black ports that are numbered 1, 2, 3 or 4.
- If your ISP has provided PPPoE (username and password) information that information may need to be configured on the CloakBox. Obtain this information from your ISP and contact support@witopia.net for assistance.
- Reboot/Restart your computer
- Browse to IP2Location to see if you have Internet access. (Your IP address will be displayed if you do)