How do I log into my Cloakbox VPN Router?
- First, make sure this computer is connected to your CloakBox via WiFi (wireless) or Ethernet (cable).
- To log in to your CloakBox please click here: 192.168.20.1
Note: The above is the default address we ship the CloakBox VPN routers with. If you have reset your router at any point, you may need to use one of these alternate links: 192.168.11.1 – or – 192.168.50.1 – or – 192.168.1.1
If the link does not work, please copy the link or just type it directly into the address bar in your browser. - You will be prompted for a username and password. Enter the details provided with your CloakBox. Default settings are as follows:
- Username = admin (must be all lowercase)
- Password = your account number – see below for further details
The password was included in the box with your the router. Please check under the lid.
You can also view your account number by logging in to your portal account, CLICK HERE TO LOG IN
Your account number will be shown at the top-middle of the page (Acccount#: w00xxxx), next to your referral code.
How do I change the WiFi network name or password on my AsusWRT Cloakbox VPN router?
1) Log in to your CloakBox
2) Click Wireless from left menu
3) Enter the wireless name you want to use in the Network Name (SSID) field
4) Enter the wireless password you want to use in the WPA Pre-Shared Key field
5) Click Apply at the bottom of the page
How do I change the DNS on my AsusWRT CloakBox VPN Router?
1) Log in to your CloakBox
2) Click LAN from the left menu
3) Click DHCP Server tab
4) Enter the DNS servers you want to use in the DNS server 1 & 2 fields
Click here for DNS providers you can use.
5) Click Apply at the bottom of the page
How do I change the VPN location on my AsusWRT CloakBox VPN Router?
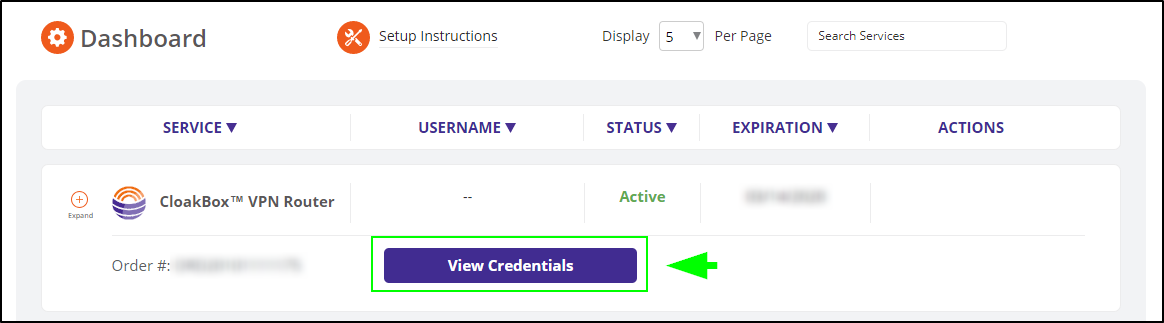
1) Log into your dashboard here. Then, next to your CloakBox order # click View Credentials
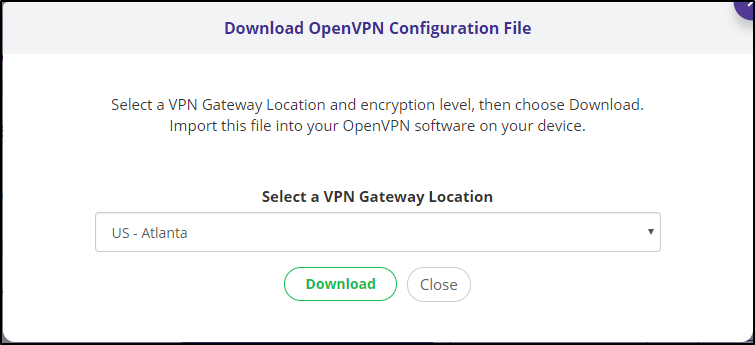
2) Scroll to the bottom of the popup that appears, and click Generate OpenVPN Configuration File

3) In the Download OpenVPN Configuration popup that appears select the VPN gateway you wish to connect to and click Download. In this example we’ve selected Atlanta.
The file will download to the folder where you usually download files from the internet
(Note: By default, this is the ‘Downloads’ folder on both Mac and Windows)
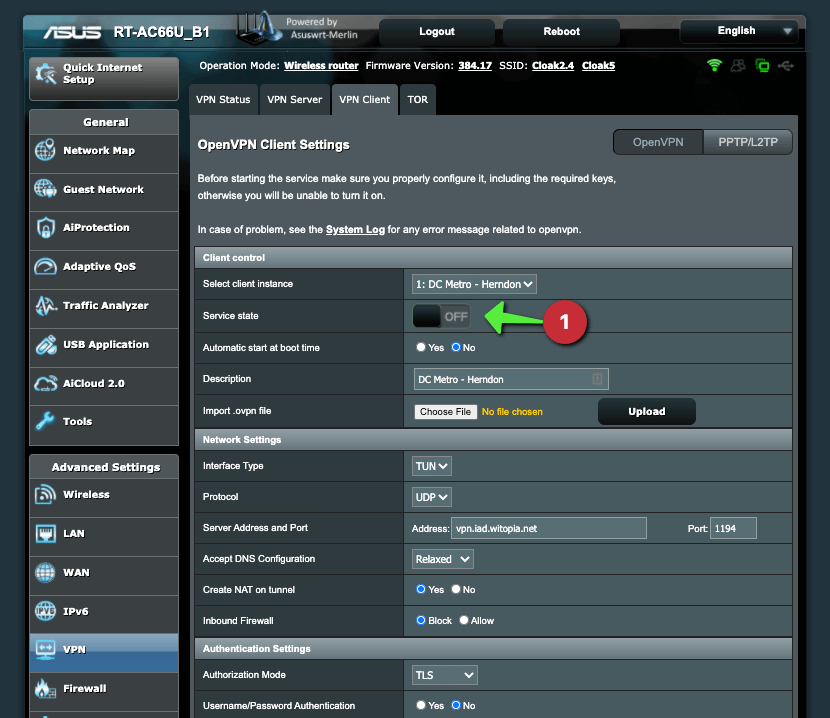
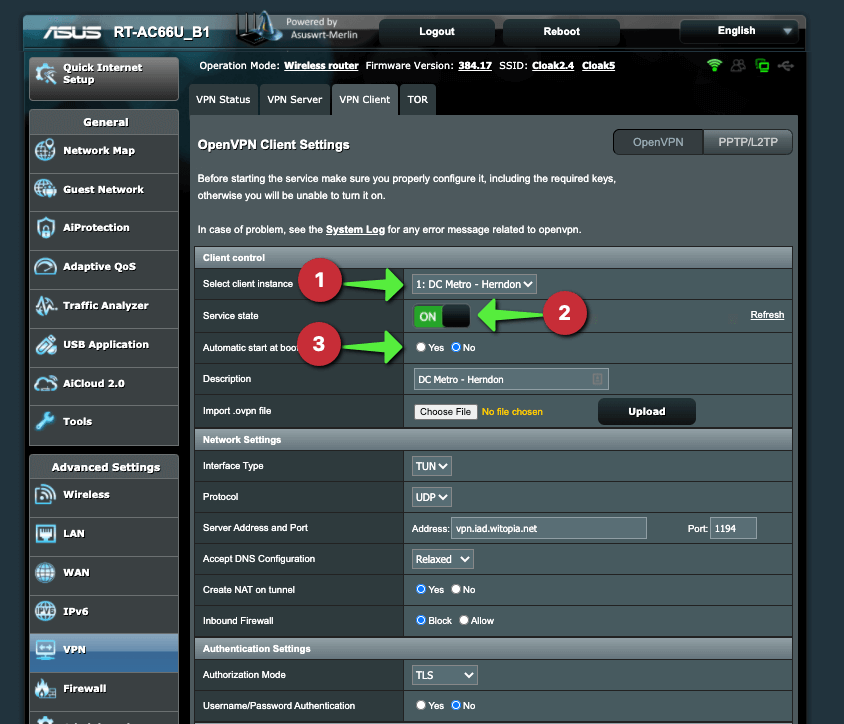
4) Next, log into your CloakBox to upload the OpenVPN configuration you just downloaded.
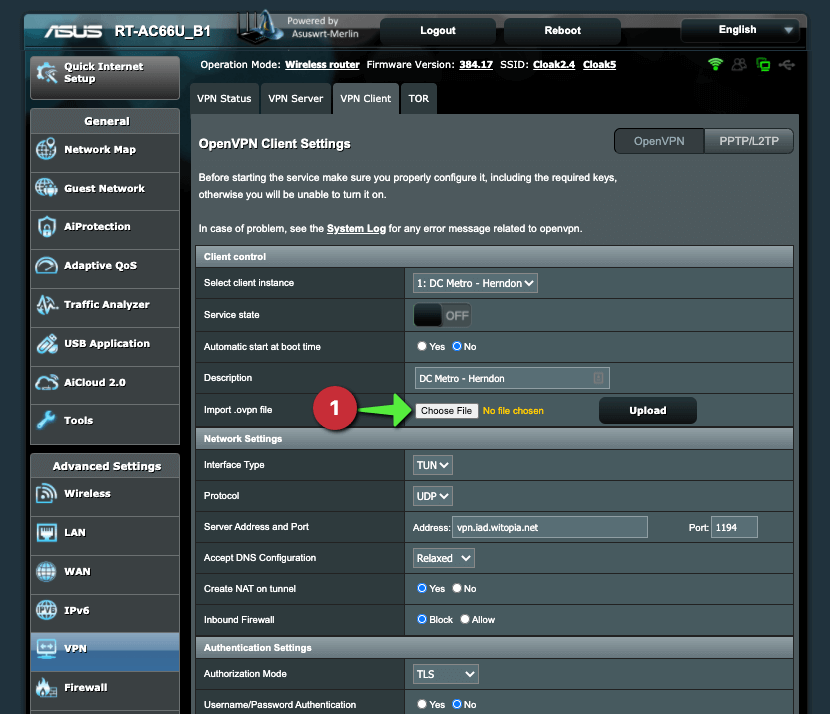
5) Once you have logged into your CloakBox, click: VPN -> VPN Client tab at the top
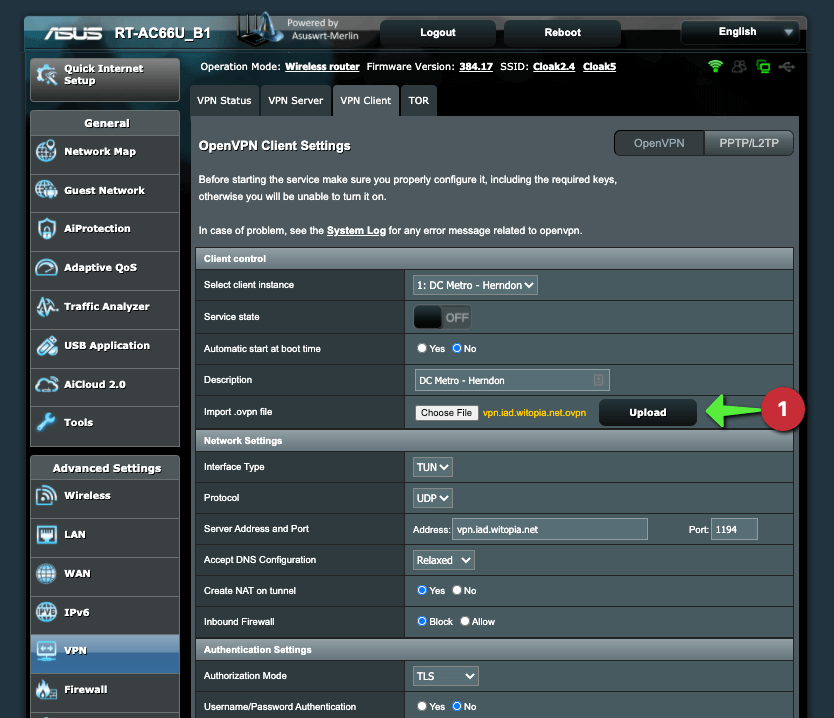
6) Click Choose File, navigate to and select the OpenVPN .ovpn file that you download in the above steps (#3), then click upload.
7) Wait for Complete to appear and for the page to refresh.
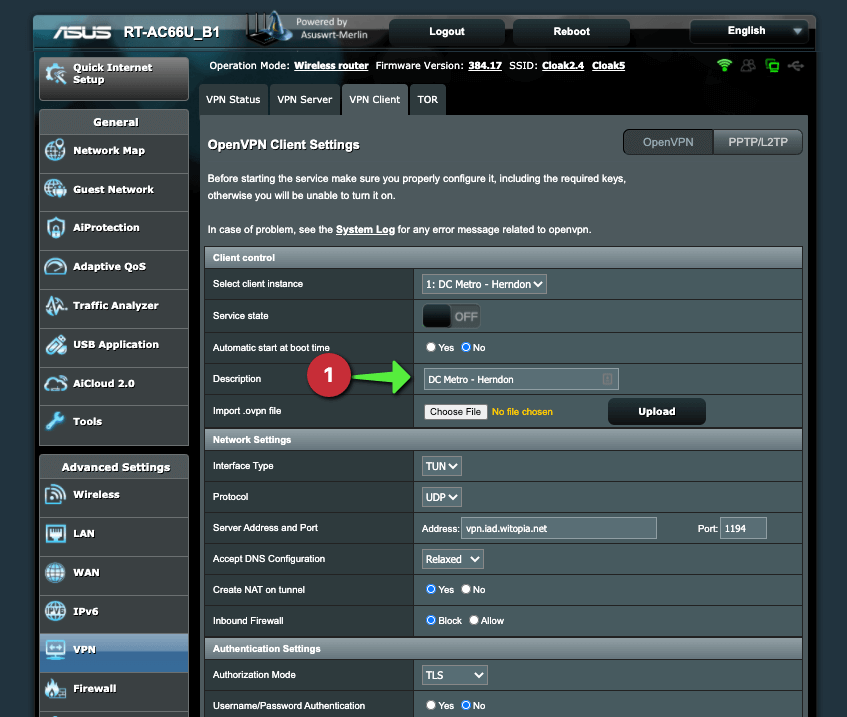
8) Update the Description
9) Click on the service state switch to enable (connect) the VPN connection and wait for Connect to appear.
10) Click on Yes by the Automatic start at boot time option.
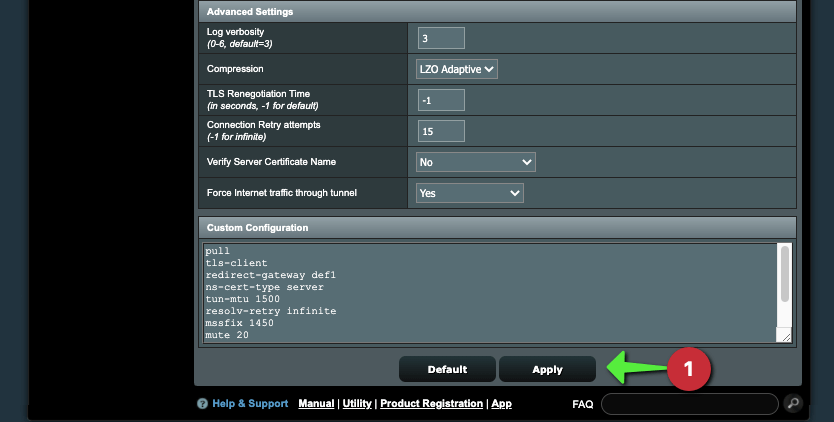
11) Click Apply at the bottom of the page.
How to update your CloakBox after renewal?
- Click HERE to log into your WiTopia Account
- Click on View Credentials under your Cloakbox subscription
- Click on Generate OpenVPN Configuration File at the bottom of that window
- Select your preferred VPN Gateway Location, then click on Download
- Log into your Cloakbox
- Click on VPN > VPN Client
- Turn OFF the VPN ( if ON )
- Click on Browse, then select the new OpenVPN Configuration file
- Click on Upload
- Update the Description
- After Complete is displayed, click on Apply at the bottom of the web page
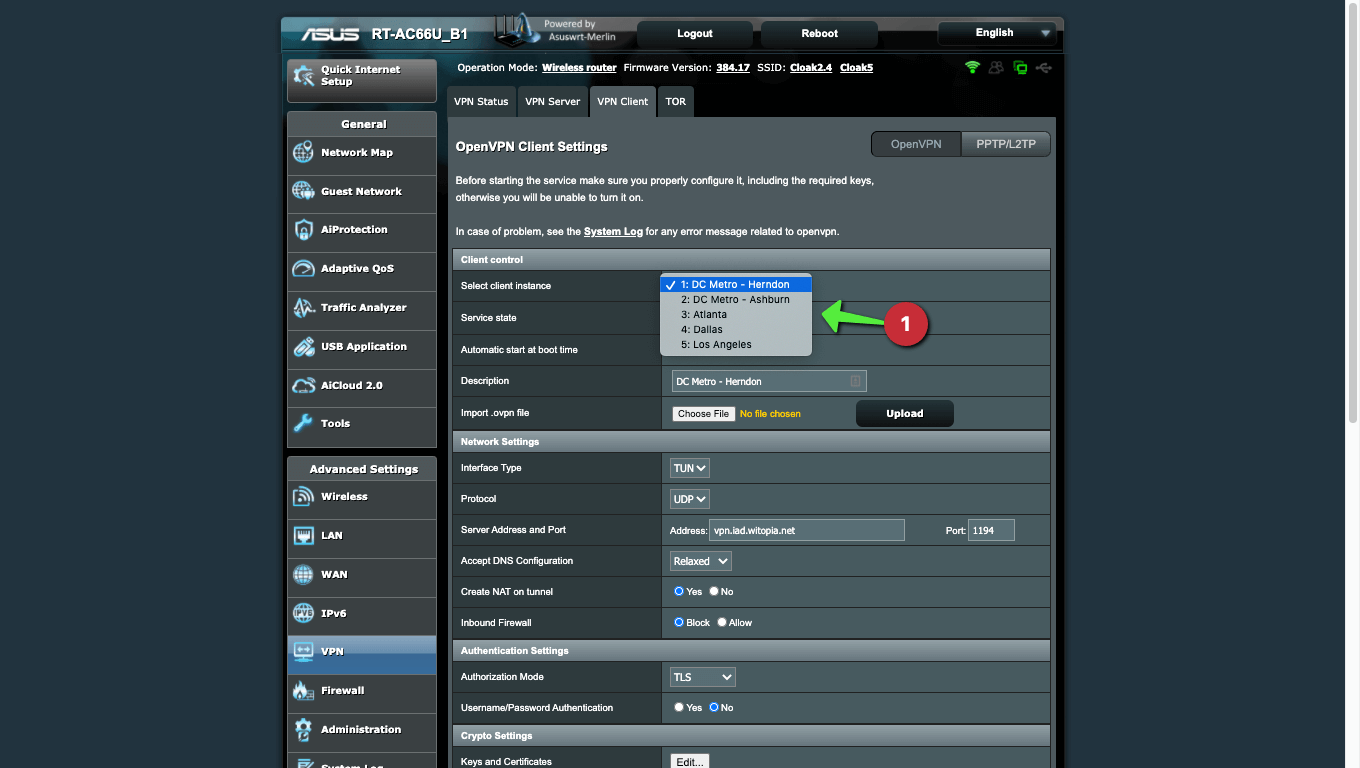
- Select client instances 2 through 5, then repeat steps 8 through 11 to update each VPN connection
- Select the preferred client instance, then turn ON the VPN and click Yes by Automatic start at boot time
- Click on Apply at the bottom of the web page
create an OpenVPN Configuration File for each location that you wish to use -> you may load up to five


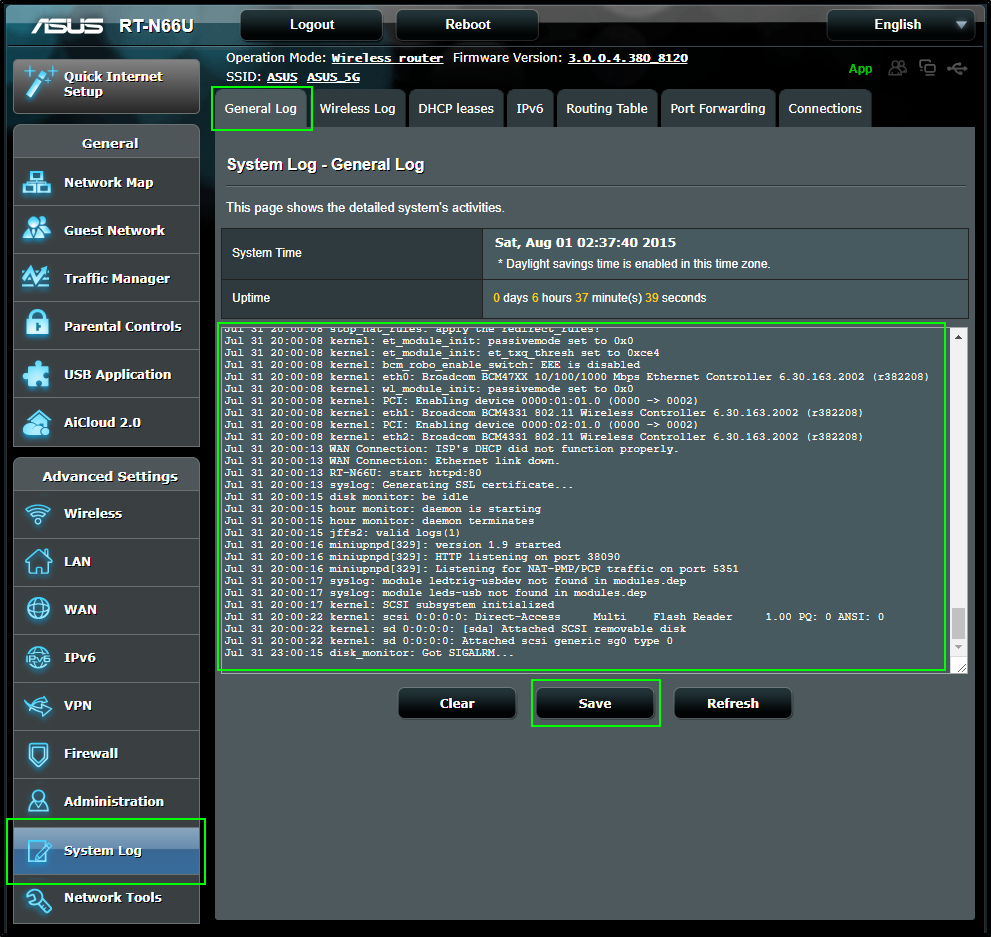
How do I get the VPN logs from my AsusWRT CloakBox VPN Router?
1) Log in to your CloakBox
2) Click System Log from left menu
3) Click General Log tab at the top
4) Click inside the log box, then copy the log and paste it in an email to support@witopia.net
For Windows: Press the CTRL+A keys on your keyboard to select all > Then press CTRL+C to copy > Then press CTRL+V to paste
For Mac/Apple: Press the CMD+A keys on your keyboard to select all > Then press CMD+C to copy > Then press CMD+V to paste
Alternately: You may click Save to save the log. Then the log file will download to where you normally download files. Send the log file to support@witopia.net